- Analyzers
- Optics & Sources
- Technologies
- Support
- About
Leslie McHenry
In early 2023, XOS introduced its next generation of analyzers— the R Series Sindie®, Clora®, and Clora 2XP single cup analyzers, followed soon after by the R Series Sindie +Cl single cell analyzer. The next step is the release of the autosampler versions of these analyzers. This release will happen in the same manner, with Sindie, Clora, and Clora 2XP autosamplers available now and the Sindie +Cl autosampler scheduled for later this year. As with the previous release, the analytical performance remains the same, with the platform getting a complete UX overhaul.
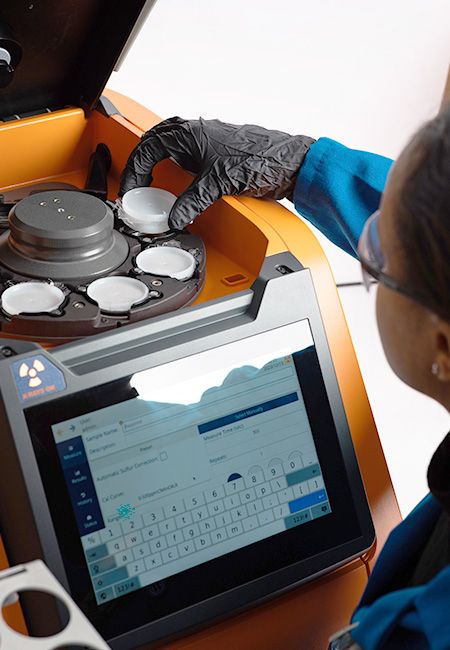
Here are ten things that users are going to love about the new XOS MWDXRF autosampler lineup:
Previously limited to Accucells® sample cups, the R Series autosampler is available with a 10-position Accucells configuration or an 8-position standard (Chemplex) cup configuration (Figures 1 & 2). The Accucells configuration uses pre-assembled, pre-vented sample cups, making sample prep mess-free and hassle-free— it’s perfect for the lab manager looking to make their process as optimal as possible. For users not ready to adopt Accucells, the standard (Chemplex) cup version is also available and may be preferred for viscous samples where pipetting the sample is difficult.
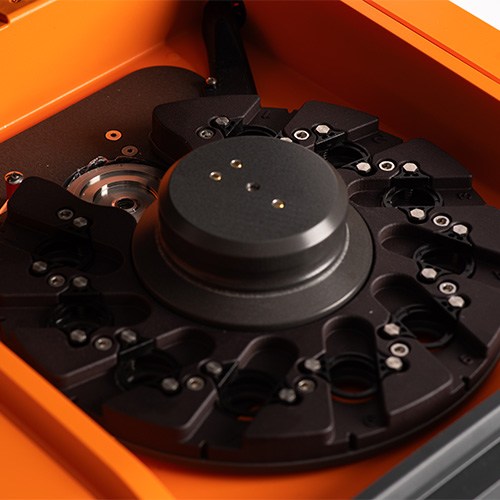
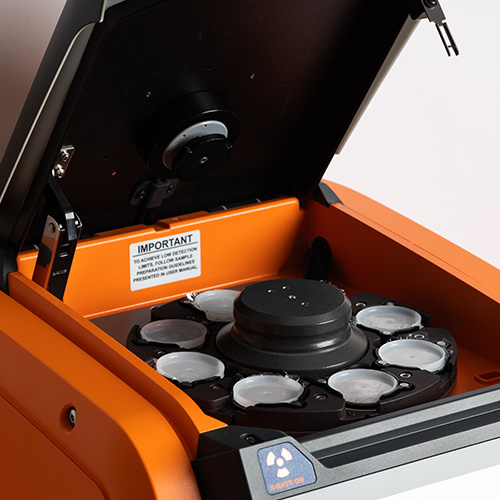
Due to its advanced optics, the incidence angle of Clora 2XP is wider than that of its Sindie and Clora counterparts. Because of this, it was only available with the 43 mm standard (Chemplex) cup single cell configuration. Now, Clora 2XP can be purchased with the 8- position autosampler (Figure 2). This is great news as users no longer have to choose between an autosampler and low concentration analysis. With chlorine measurement in biofuels and biofeedstocks becoming more prevalent, the advanced optics of Clora 2XP ensures accurate results where chlorine content is low and oxygen is known to impact XRF limits of detection.
Related: Ensure Accurate Results for Sulfur & Chlorine Analysis in Biodiesels
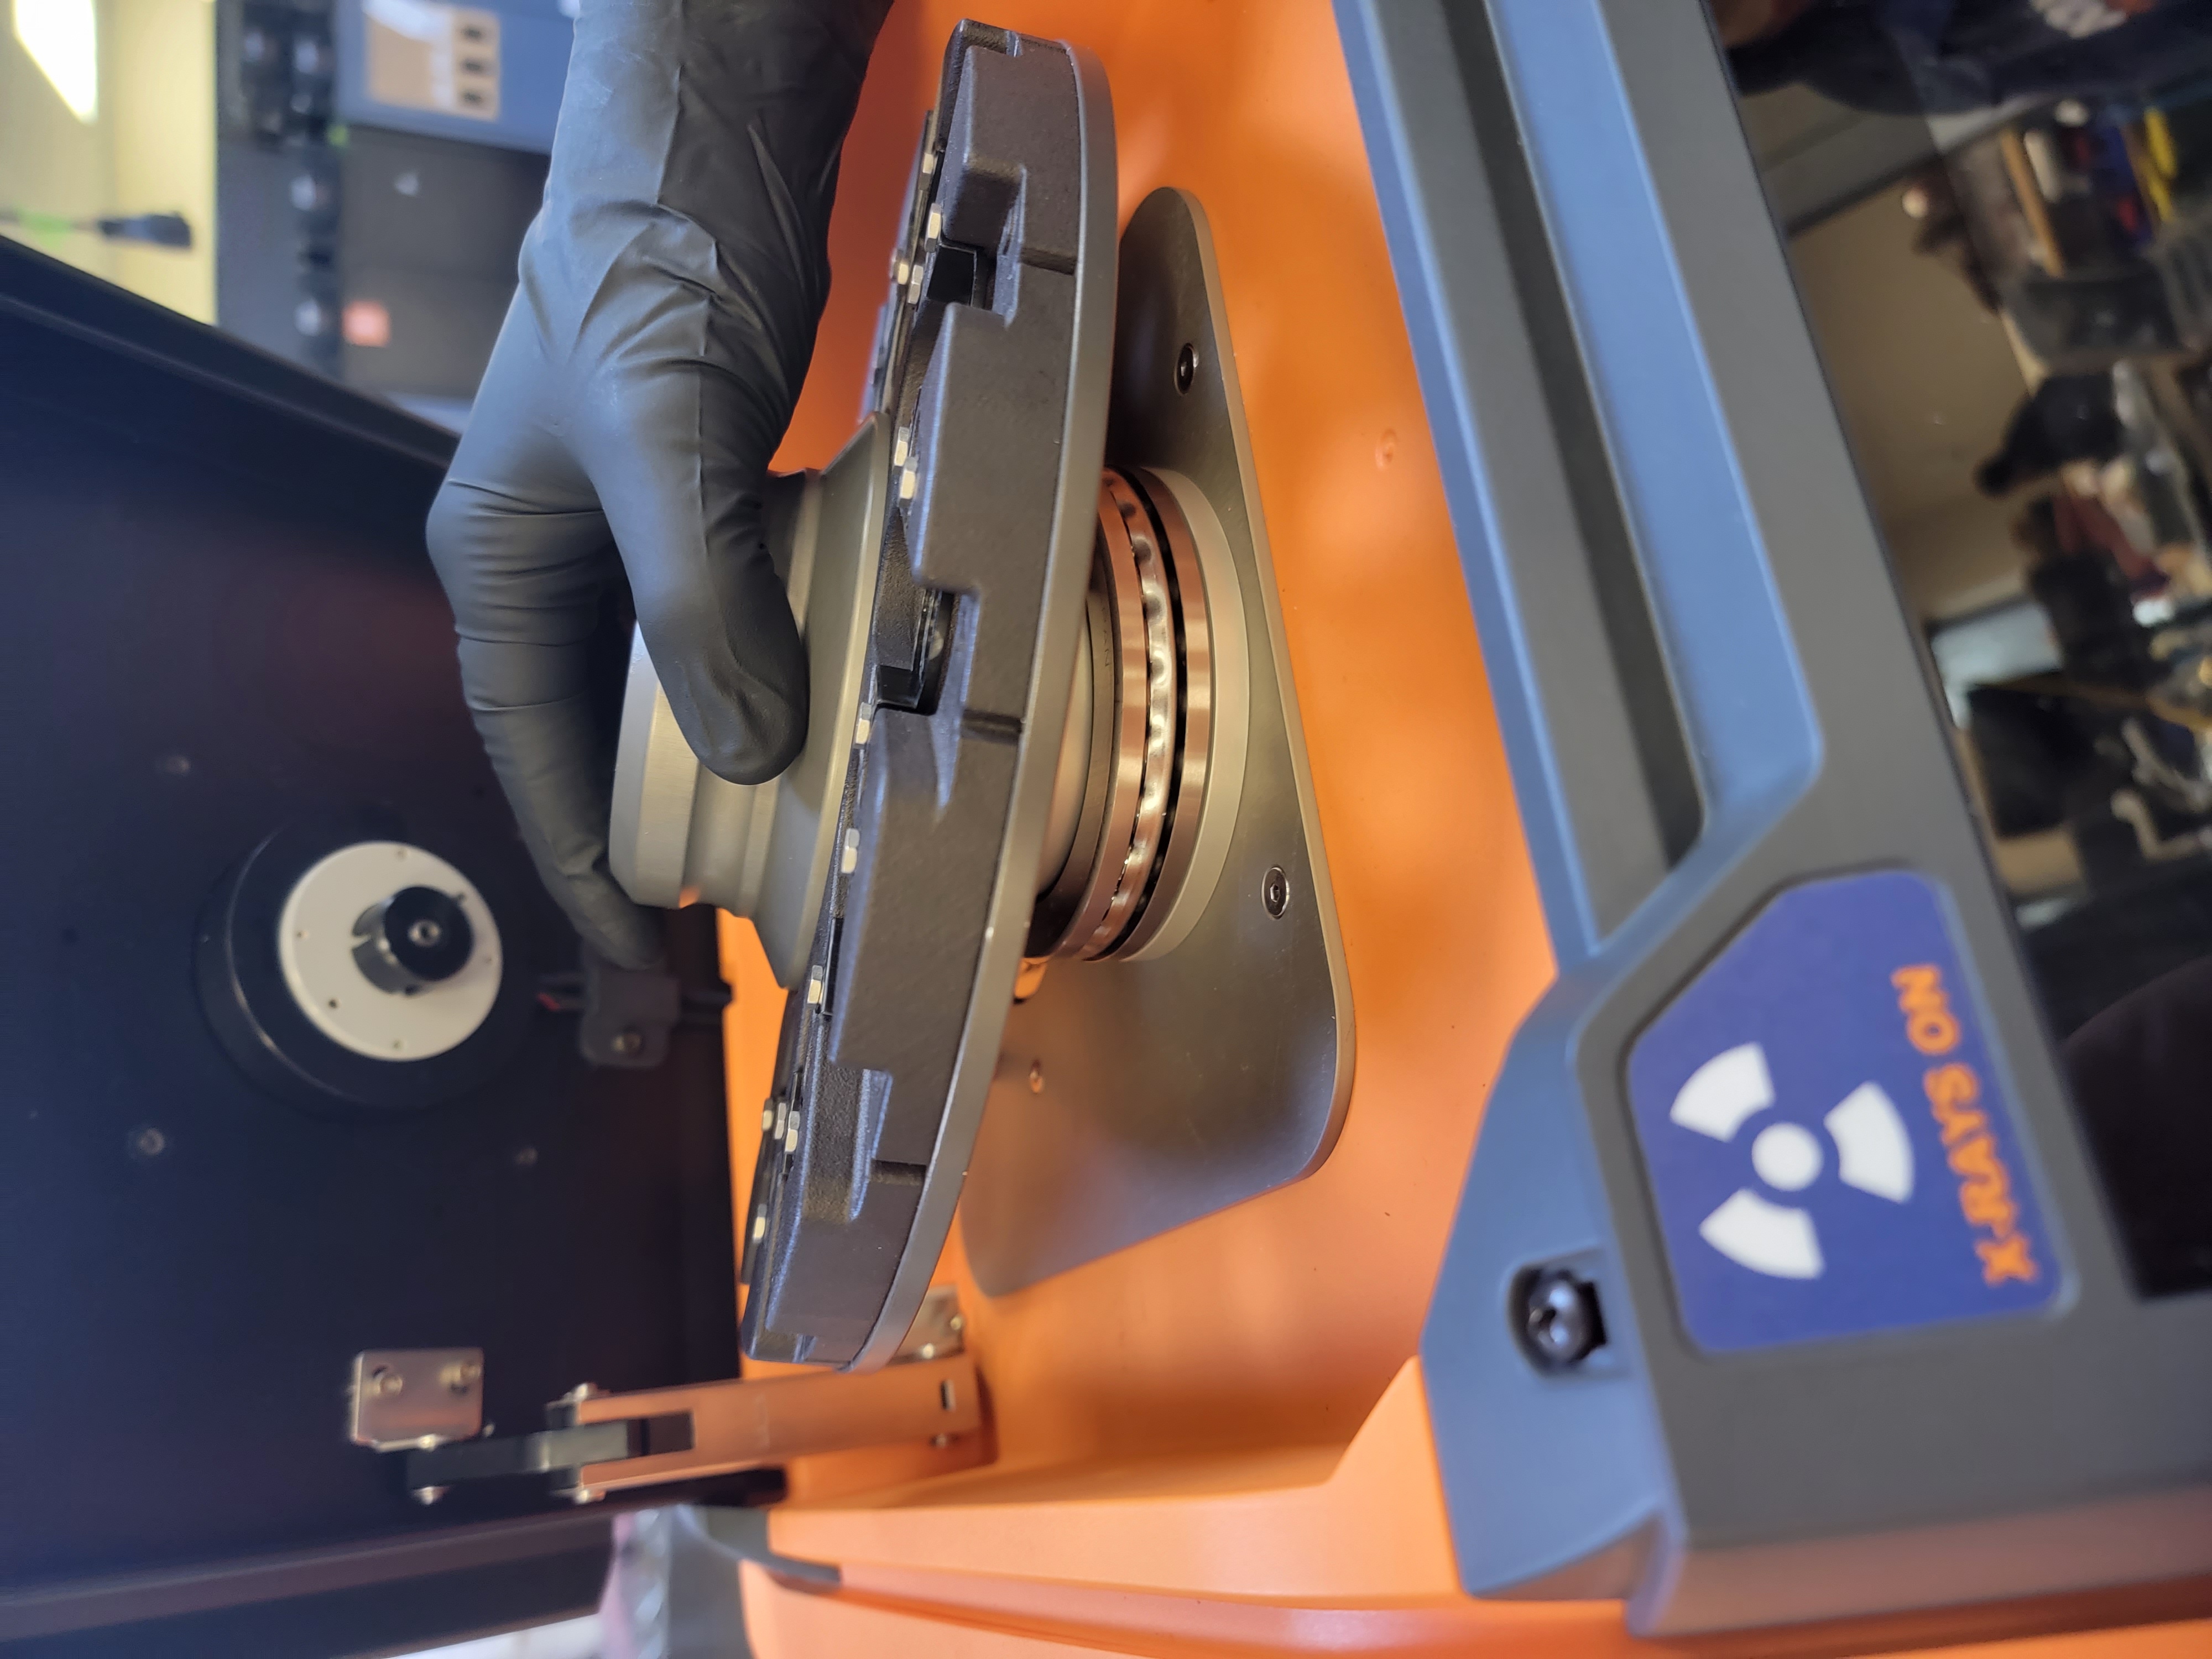
Spills happen. Sample cup film breakage in the autosampler tray means, at minimum, a hidden mess to clean up and, at worst, contamination of every sample measured after the spill. The previous M Series autosampler tray was held in place by a wing nut, which offered simple removal and replacement of the tray. R Series is even easier than that, and is held in place by magnets. Simply grab the center hub and pull upwards to remove the tray (Figure 3). When the tray is replaced, listen for the click of the magnets engaging to ensure that the tray is back in its proper position.
The new UX experience seen in the R series single cup analyzers translates over to the autosamplers, providing more flexibility when running measurements in the different tray positions. Previously on M- Series autosamplers, certain settings such as measurement time or calibration curve selection would have to be set at the beginning of a carousel run and used for all positions within this run. This is no longer true for R Series. Figure 4 shows the measure screen for the new R Clora autosampler. The user simply selects the position number buttons (numbered circles in Figure 4) to enter/review the measurement parameters for each position. Now, the user has more freedom to customize each measurement position; however, this freedom comes with added responsibility— (see “Using These Settings Responsibly”). In the meantime, let’s look at each of the settings in more detail.
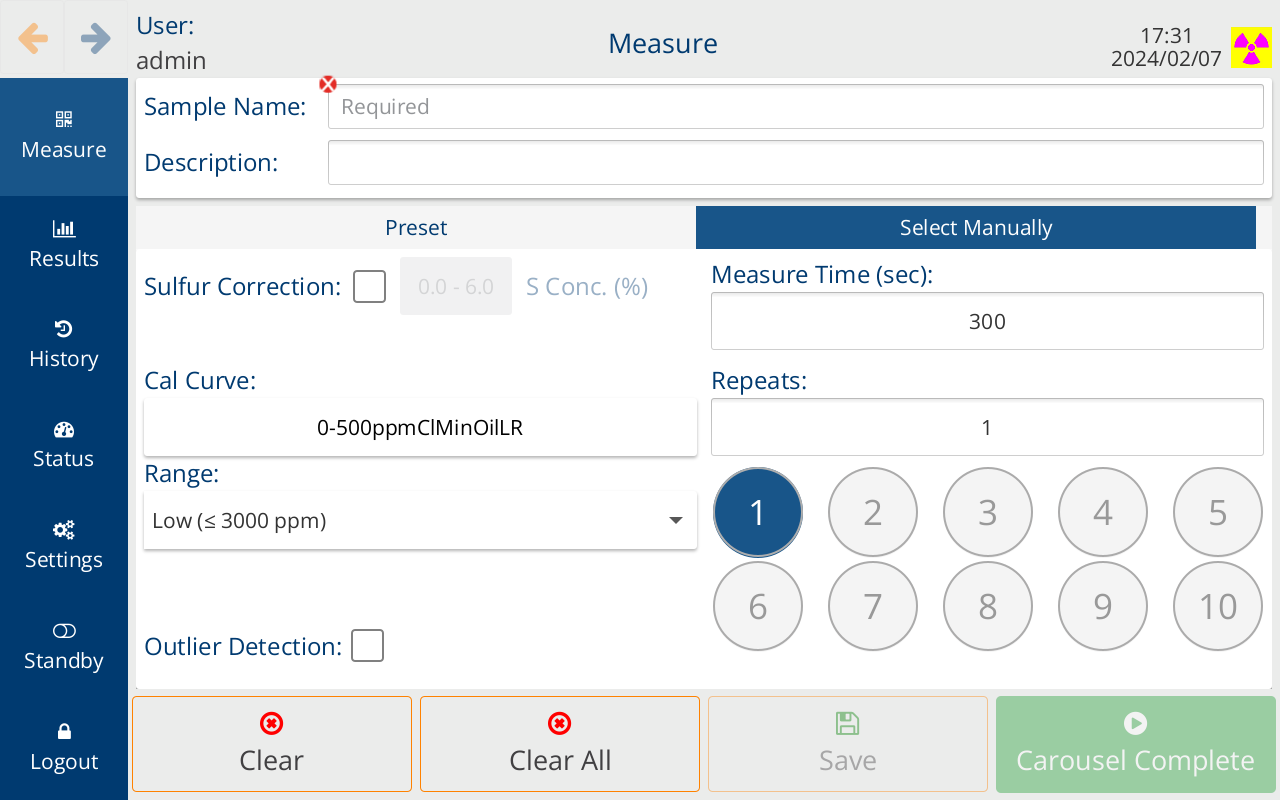
You can now vary the measurement time and range for each position, which is a useful function when measuring multiple sample types at varying concentrations. The lower the concentration, the longer the measurement time needed to obtain precise results. For example, when measuring stable, homogenous samples near the detection limit of the analyzer, use a 600 or 900s measurement time to get better counting statistics and better precision. As the concentration goes up, the standard 300s measurement time (600s in 2622 mode) is sufficient for most samples. When in high range (samples >3000 ppm), a 100s measurement time (200s in 2622 mode) is recommended. On R Series, while it’s possible to measure all three of these samples during a single carousel run, it might not be recommended. Read “Using These Settings Responsibly” for more detail.
Which XOS R Series analyzer is right for you?
With this latest update, you are no longer limited to a single calibration curve for each carousel run. This is useful on both Sindie and Clora analyzers where many users are setting up matrix- matched calibration curves. Now, sulfur in gasoline and diesel samples can be set up and analyzed during a single Sindie carousel run, or chlorine in the crude layer and water layer on a single Clora or Clora 2XP carousel run. Simply select the correct calibration curve from the Cal Curve drop- down when entering the information for each sample.
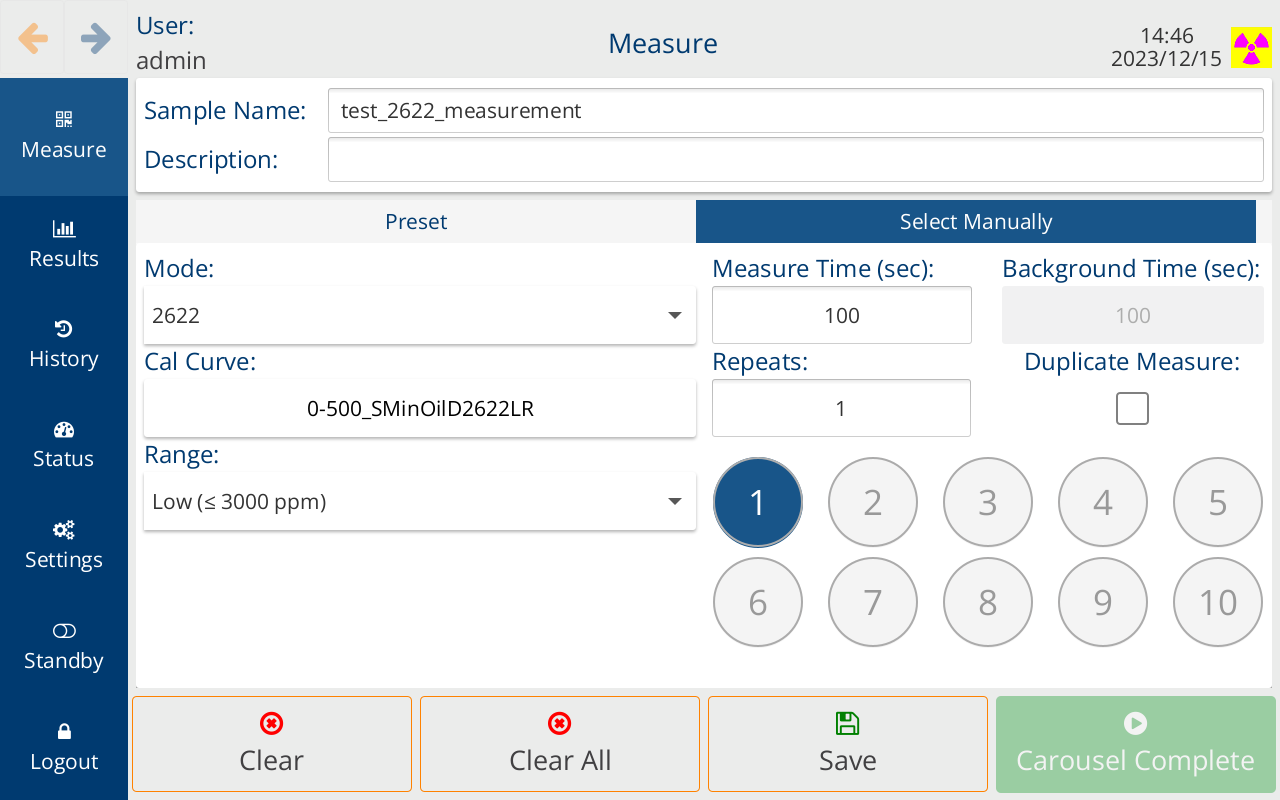
Yes, you now can measure both D7039 (or ISO 20884) and D2622 in a single carousel run! Like the range and calibration curves, sulfur mode is selected individually for each position. Note that for 2622 mode, the background measurement time (Figure 5, grayed out box on the center- right) adjusts automatically based on the sulfur measurement time. The total measurement time is the sum of the Measure Time and the Background Time.
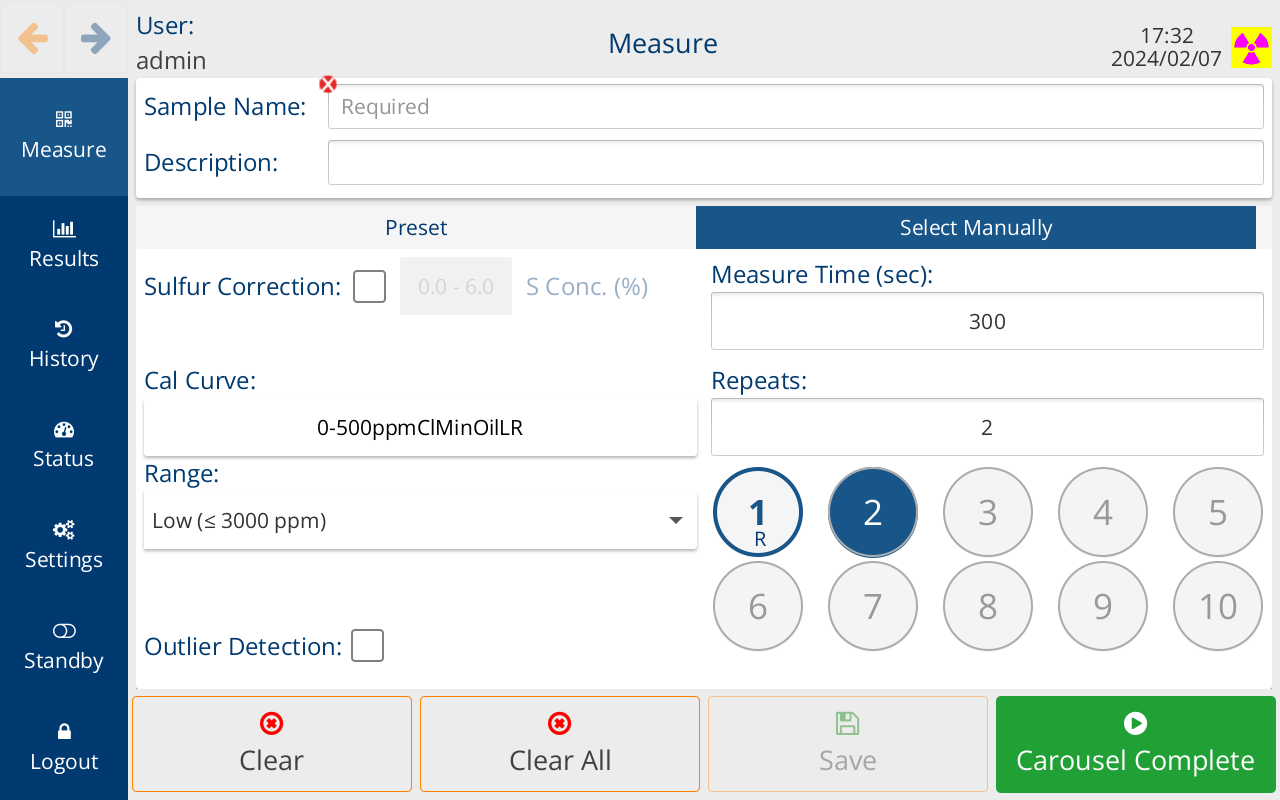
In response to user feedback, the R series autosampler allows for repeat measurements in all positions. When repeats have been selected for a particular position, an “R” will appear under the position number once the measurement parameters have been saved (Figure 6 lower right, position 1 indicator).
Additionally, when it comes to autosampler repeats, read “Using These Settings Responsibly” for more detail on why using the repeats function to screen for settling is not recommended.
Related: The Next Generation of Elemental Analysis
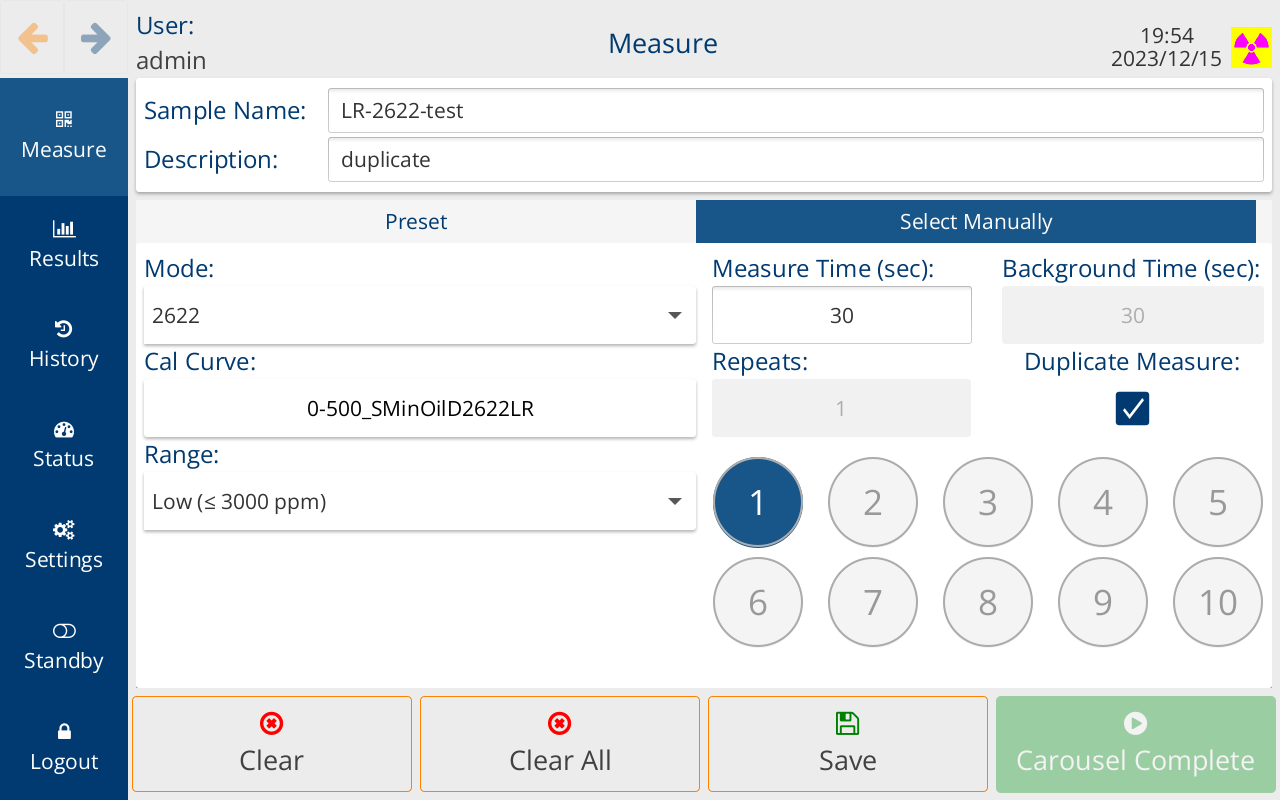
ASTM D2622 requires duplicate analysis on samples less than or equal to 100 ppm for calibration and sample analysis. The duplicate must be made on a new portion of sample material instead of repeating the measurement on the same sample cup. Instead of filling the carousel with duplicate samples (positions 1+2, 3+4, etc.) and having to average the duplicate results manually, the average results for duplicate measurements in adjacent positions on the R Series autosampler are automatically averaged, avoiding potentially costly mistakes and wasted time. When "Duplicate Measure" is selected for a particular position on the autosampler and the measurement saved, the next position is pre- populated with the same settings, description, and measurement name. Both positions will then display a “D” under the position number. See Figure 7 for a duplicate measurement entered in position 1 prior to pressing the “Save” button and Figure 8 after “Save” is pressed.
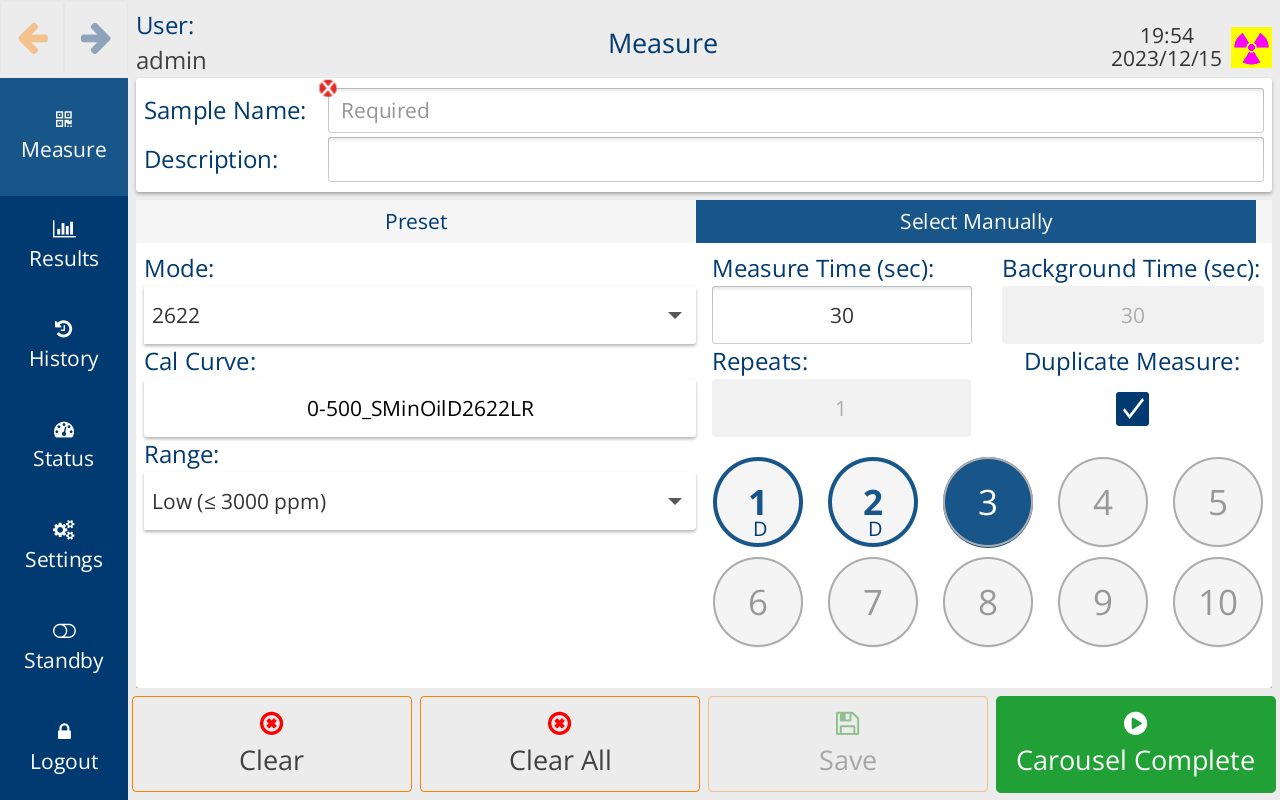
An exciting UX improvement for the R Series is the addition of Immediate Mode for the autosamplers. Traditionally for XOS MWDXRF autosamplers, users would put the samples in the analyzer, enter all the measurement information, and then the analyzer could start the first measurement. This process delays the measurement start until all samples have been placed and the information entered—this is called Delayed Mode (Figure 9, blue highlighted text) on R Series autosamplers. To improve efficiency, R Series autosamplers also have an Immediate Mode option. When this mode is enabled, the user first prepares the sample cups and places them into the autosampler tray, then enters the measurement information for position 1. When the measurement is saved, the autosampler immediately starts measuring. Then, the user can enter the measurement information for the other samples.
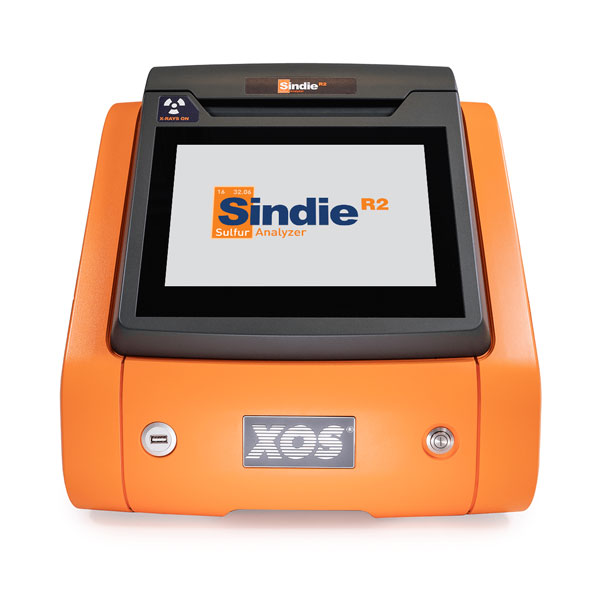
Easier to use than ever, Sindie R2 provides the best value and combination of detection limits, measurement speed, ease of use and reliability and is the ideal sulfur analytical solution to help you stay in compliance with ASTM D2622, ASTM D7039, and ISO 20884 methods, enabling complete flexibility for your analytical needs.
There are some potential sample challenges to consider when using any carousel-type autosampler, not just R series, especially when looking at volatile or unstable samples. This may lead to grouping of samples by concentration, running them in a specific order, or even running them one at a time. Here are some things to look out for:
• Follow Best Practices for preparing samples, including venting sample cups off center to avoid plunger contamination. For those using sample film on a roll, be aware that excess film may be caught in moving parts.
• High concentration samples may contaminate lower concentration samples (liquid on the plunger, vented vapors, or sample cup leaks). Consider running lower concentration samples first or separate them into a different carousel run.
• Run volatile gasoline first. Be mindful about filling a carousel with winter gasoline, especially in 2622 mode, where the last sample may be sitting around for over an hour before analysis.
• Measure sulfur in crude oil separately from finished products and low concentration intermediates. The volatility of some crudes will dictate an earlier position in the carousel, but high concentrations could contaminate other samples.
• Samples that settle, separate, or solidify over time require special consideration. Measure unstable samples in position 1 and shorten measurement time if needed. If the sample is particularly unstable, ex. chlorides in a raw low viscosity crude, use additional sample prep to stabilize the sample such as crude extraction or D4929 distillation and/or don’t use an autosampler for analysis. Measure samples in liquid or solid form, semi-solids that change state during analysis may produce erratic measurement results.
• Setup and use presets for different sample types/measurement conditions to reduce data entry errors. R series autosamplers are compatible with bar code scanners and LIMS to further reduce errors.

Leslie McHenry is Applications Supervisor at XOS. For over a decade, Leslie has been helping leading laboratories and petroleum refineries around the world meet their testing needs. Leslie is an active member of the ASTM International community and has co-authored several ASTM XRF test methods. Prior to joining XOS, Leslie worked as a Petroleum Chemist at a North American petroleum refinery.
If you'd like to get in touch with Leslie or one of our other experts, click here.

